While planning these flip-books, it was important that I keep myself busy thinking about what I wanted these flip-books to look like. Some of many questions that I had were:
- How big should they be?
- What do I want them to look like?
- How will they be bound?
- What colour are they going to be?
- What shape to go for?
During early stages it was all about planning and visualising them. In order to get an idea I made these mockups of the letters A, B and C. I wanted them to be personal and unique so the shape of them had to be different from traditional shaped books. Not only will they be part of my final major project, they will also be holding important messages for people to engage with. Since I had most of the materials at home, I decided to challenge myself to make these books all by hand. I have never stitched a book by hand so that was something good to look forward to.
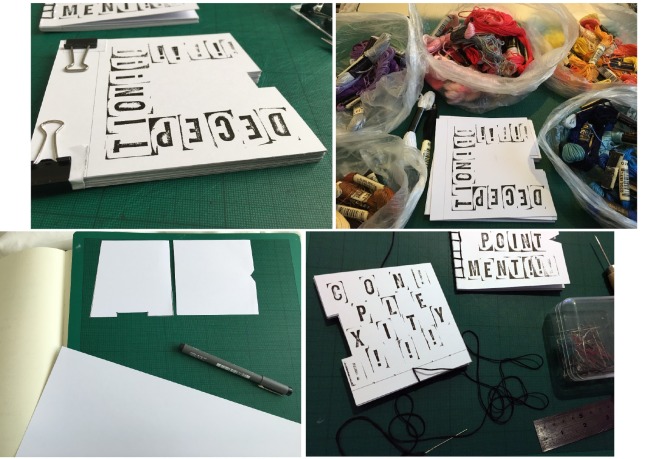
The first book I made was the ‘B’ shaped since I had already planned what was going inside of it.
‘B’ shaped book is about ‘Employment’ which can be a ‘disappointment’. In order to have a variation I decided that each book draft that I will create will have different stitching and paper choice. Paper choices is one of the most important elements of a flip book, if the correct paper choice is not used it will be very difficult to show the animation properly. For the cover I used 240gsm and 90gsm for the inside. The book was quite slim and easy to flick.
‘C’ shaped book was created next with a very different paper choice. The cover was 240 gsm card and 210 gsm pages. Straight away I could see a massive improvement in quality. Since I had stitched the previous book before I was a little bit better at stitching. The beauty of bookbinding is that when you start, you are not that great but within stitching a few books you become a pro.
‘A’ shaped book was possibly the most enjoyable book to make due to the cover design and shape of the books. I used 240 gsm for the cover and 160 gsm for inside.
As shown in the last photo, each book has a different stitching method. This is because I wanted to have a variation to choose from. I must say the letter ‘A’ is my favourite because it’s simple and elegant.


 I’ve decided that saddle stitching is the neatest and more successful option. The equipment I used was:


